Tuesday, November 6, 2018

Don't Settle for the Little Dream

Hello crafty friends! Back again with another fun challenge over at Scrap Our Stash! I'm a big fan of movies, so I always LOVE  the Golden Globe challenge. How fun to take a bit of inspiration from a favorite movie or tv show? This month the challenge was based off of a movie on the big screen right now, A Star Is Born:
  

The trick for this one is to create a layout using star pattern paper, 3+ star embellishments, and include the quote "Don't settle for the little dream, go on to the big one". Here's what I came up with:


My son just had Senior Night for soccer, and one of the fellow soccer-moms took these pics of him for a poster we were making. I ended up choosing the center pose for the poster, since he is a boy that always smiles with his mouth closed (so much for spending all that money on his beautiful teeth right?). But i really liked all 3, so decided to use them on this layout. Since it's a Senior Year layout. the quote for the challenge worked really well. 

Want to play along with this fun challenge for your chance to win a $20 gift card to Michaels, JoAnn, or Hobby Lobby? Visit the Scrap Our Stash blog for all the details and see what my fellow designers have created! =) T

Wednesday, September 19, 2018

Dream Big


And here's my take on it:


I chose to use 3 photos and that were in the 1st sketch, and layered them on top of a large square with torn edges, similar to the jumbo bracketed piece in the 2nd sketch. I just love that jumbo scallop element! (using a scrap of red polka dot paper I’ve had in my stash for years). I flipped my title to the top, rather than the bottom on both, and added 3 wooden buttons along with puffy hearts and nests of thread in 3 embellishment clusters. 

I hope you'll visit the Scrap Our Stash challenge blog to see what the rest of the Design Team has created, and take part in the challenge too! Looking forward to seeing your take on this Blended Sketch challenge. =) Tiffany

Wednesday, September 5, 2018

Boston Pride Parade

Hello crafty friends! Back again with another fun challenge over at Scrap Our Stash! I'm a big fan of movies, so I always LOVE  the Golden Globe challenge. How fun to take a bit of inspiration from a favorite mobie or tv show? This month the challenge was based off of the award-winning show, Transparent:


The trick for this one is to create a grid design, and include a transparency on your layout. Here's what I came up with:


The Boston Pride Parade was the perfect event to scrap for this challenge. I printed my focal point photo as a 4x6, and then printed my other pics as 3x4 and grouped around the main photo in a grid formation. I had a great little rainbow flag transparency and rainbow stickers from the parade that made simple and bright embellishments. Because the photos were busy and I had lots of rainbow embellishments, I decided to keep my background plain white (although it was very hard to resist the urge to ink and splatter!).  For a final touch I tore the edges of the background paper to reveal a strip of rainbow pattern paper. This helped to frame the layout a bit, and draw your eye into the center. 

Want to play along with this fun challenge for your chance to win a $20 gift card to Michaels, JoAnn, or Hobby Lobby? Visit the Scrap Our Stash blog for all the details and see what my fellow designers have created! =) T

Sunday, July 22, 2018

Squad Goals

Hello crafty friends! I'm back again today with a new layout for the Scrap Our Stash design team. This time I'm up for the Blended Sketch challenge:


The challenge is to create a new layout based on both sketches. Blend the 2 together to create a new layout, and don't forget to add sequins. Here's what I came up with:


I combined the 4 stacked photos of the first sketch with the title placement and left side vertical strip of the 2nd sketch. I printed my photos as 3x4" so I could squeeze all 4 in a grouping. Sprinkles of sequins in shades of pink were added below the journaling, above the top left photo, and next to the bottom right photo. Be sure to visit the Scrap Our Stash blog to see what the rest of the DT has created. I look forward to seeing how everyone blends these 2 sketches in their own unique ways! =) T

Friday, July 20, 2018

New Design Team Member!

Hello crafty friends! So excited to share that I am a new Design Team member at Scrap Our Stash! The SOS blog has 2 fun challenges each month, both encouraging all of to use that ever-growing stash. The Golden Globe Challenge combines a movie as inspiration with an added twist of some other item or design element that needs to be included in your layout. The 2nd challenge of the month is the Blended Sketch Challenge, where you're given 2 different sketches as inspiration. Combine your favorite elements to create your layout, but be sure to include the additional item listed!

Here is this month's Golden Globe Challenge:


and my take on it:


For this layout, I hand-cut a sunburst shape out of yellow patterned paper and layered it over a sky blue water colored background. To mimic the movie poster, I printed a whole bunch of 2x2” photos that were highlights of last summer. I put my title in the center of the sunburst and had my photos coming out over the rays, creating a big summertime collage. A few epoxy stickers, sunshine embellishments, and nests of blue thread finished up the layout. 

Stop by the Scrap Our Stash challenge blog to say hello, and participate in this month's challenges for your chance to win a $20 gift card! =) T

Saturday, June 23, 2018

High Five

Hello crafty friends! It's been a cold, rainy day here in Massachusetts. Perfect for scrapbooking, so I'm sharing a fun layout that starts with the Striped Sensation challenge at Paper Issues:


and here's the sketch from Let's Get Sketchy I used for inspiration:


Thanks for stopping by! =) T
Tuesday, June 5, 2018

Happy 15!

Hello crafty friends! Yesterday was cold and rainy here in Massachusetts. Not a great June day, but the yucky weather was perfect for staying in and crafting! To get started, I pulled out 3 pics I had from my daughter's 15th bday. Then I began to browse my favorite challenge blogs for inspiration. I first started with the "What's Going Down" challenge at Paper Issues. This required me to keep everything at the bottom 1/3 of the page. And that worked really well with the latest sketch up at Sketches in Thyme, so here's what i came up with:


and here's the sketch I used: 

The PP I used was already beautifully splattered on the bottom 1/3, so it was a perfect starting point. I added strips from a grey scrap along the edges as the sketch asked for, and strips of a pink striped scrap above and below the pics. I squished my title right on top of the photos too, just to keep everything on the bottom of the layout. Added my journaling, a tag and twine, and this fast layout was done! Thanks for stopping by! =) T

Tuesday, May 29, 2018

Explore

Hi crafty friends! One of my favorite things to do when I'm stuck for an idea is to consult my favorite challenge blogs. Always a great way to get me to think outside the box and try something that isn't my standard go-to technique. For this layout I started with a sketch that's a collaboration between Paper Issues and Let's Get Sketchy:

and here's my take:

For this layout, I used goodies from a custom kit I purchased from The Wild Hare Kits. This is a pretty fun kit club, you create a style profile, and they curate a kit with things to fit your style. Very fun! I love how this sketch allowed for a variety of pattern papers. I really enjoyed mixing the bold black and white graphic with the fun navy/coral/mint geometric print. Layered it all on a plain grey CS background so it wasn't too crazy. Tucked a gold clip with coral flag on the photo, and then added a few gold stars throughout the layout, as well as a sprinkling of gold splatters. A little metallic is always a nice touch! Thanks for stopping by! =) T


Challenges for this layout:
Paper Issues- Partnered Up
Let's Get Sketchy- Sketch
Challenge Up Your Life- Gold

Sweet Things

Hello craft friends! Back again with another layout in my adventures with The Hundred Day Project. First I started with this sketch from The Hip Kit Club:

And here's what I came up with:

I used goodies from my July Hip Kit to put this together, and I must admit, when I first saw that gumdrop papers, I thought there was no way I'd ever use it! But I had these 2 pics of my kids with their cousins on Easter, and for us it was a day filled with lots of sweet treats, so why not put this fun paper to use? It's busy, but that's ok with me on a fun holiday page like this. 

A few things to note on this layout: The smaller 3x3 pic on the left is on craft foam to give it a little lift. That also gave me the chance to tuck the title and tag behind it, and gave it a little lift as well. I made the banner just with a scrap of black paper and then a whole slew of wood veneer flowers layered on top. I did the journaling on paper strips as there was no way it would show up on those gumdrops! 

Thanks for stopping by to see my sweet layout! =) T

Monday, May 28, 2018

Sunny's House

Hello crafty friends! Back in April I decided to give The Hundred Day Project a try after listenening to several crafty podcasts. It sounded so wonderful, and I thought, "sure, I can create a layout a day for 100 days". Now my family, who probaly can smell my crazy ideas that are never going to work from a mile way, where pretty sceptical. Even my daughter kind of giggled and said, "One hundred days? Really mom?". I should've listened, but I was also convinced I'd be able to prove them wrong.

Well, here we are on day 50something, and I'm on layout # 24. Ouch. But it's still 24 FINISHED layouts, so can't complain that much. Here's the first one I created, back when I thought I'd be doing all 100....


This was a really quick and fun layout to do. It's way out of my comfort zone and not quite my style, but I think it fits the playfulness of the photos. The PP I wanted to use had a ton of great phrases, so rather than using it as my background and potentially covering up some good words, I used a dotted blue and green background and then stacked favorite phrases above and below the pic. The house sticker tucked in on the left is clear, and wouldn't have showed up well on the pink stripe background. So I stuck it onto a scrap of white CS and fussy cut it to ensure it would stand out. I added a yellow diecut heart on the right to balance out the yellow of the house, and that made a nice spot for my journaling as well. 

I have lots more to share of my continuing journey in The Hundred Day Project. Thanks so much for stopping by! =) Tiffany

Monday, March 26, 2018

Hello Easter Bunny

Hey there crafty friends! Had some fun getting a little scrappy time in over the weekend, here's what I created:

To get started on this layout, I began with the Frame It Up challenge at Paper Issues and the Squares challenge at The Studio Challenges. I had 3 chipboard frames in my stash left from a Simple Stories collection from several years ago, and I thought the spring colors would fit my Easter Bunny pic. I layered the "you and me" card from Stampin Up behind the largest frame, and added cardstock and sweet puffy bunny stickers to the smaller frames. I also wrapped each frame with black and white twine. All of my goodies were layered on top of 2 pattern paper scraps, as well as a chunk of black CS with a filmstrip border punch element. 3 shiny pink diecutes were tucked into the layers, and I added the hand-drawn word "bunny" to the hello card as my title. Kind of a busy page, but it speaks to the fun my neice had meeting the EB last week! 

Thanks for stopping by! =) T

Thursday, March 22, 2018

Isn't She Lovely

Hello crafty friends! There's a new baby in our extended family, and that means I get to create a sweet girly layout for the new arrival.


And I based it on this sketch from Sketch N Scrap:

For the layout I started with the Hip Kit Club kit from April 2017. I have quite the stash of these gorgeous kits and am trying my best to work my way though them. I started with the sweet bunny background paper as my base, tying it in with the Easter challenge at Shopping our Stash. I then built layers with the photos, tissue paper, and a couple PP scraps. I also fussy-cut flowers from a floral PP and then tucked those under either side of the photo mat, and then at the bottom right corner as well. A smaller flower in each cluster was put on foam adhesive to add some dimension.

Thanks for stopping by! =) T

Monday, March 19, 2018

Life's a Climb

Hello crafty friends! It's a cold but sunny day here in Massachusetts. I had a few pics of a sight-seeing adventure we went on last fall, and I thought the sketch from Stick it Down would work well. 


and here's the sketch:

I must admit, at first glance I found this sketch to be intimidating. But scrapbook challenges are all about trying something new and taking risks right? I scrolled through the great examples from the Design Team and then got started. 

First, I needed a long title, so off to Pinterest I went and searched for "view quotes". Found a few great ones, but the winner was "Life's a climb but the view is great." The last few years have been FILLED with challenges here at home, but we do our best to tak eit in stride and try to find the good in every day. This quote not only fit the pictures literally (the view was spectacular), but also figuratively with what we've been dealing with. NOw I don't have a machine that will cut letters out like this (and oh how I wish I did) so I hand-wrote the title and painstakenly cut it out with my craft knife. It was a good activity to do while watching a movie. I also popped the background up on foam so that the title had a bit of a shadow behind it. I cut my photos in 3.5" squares and popped them on foam as well, giving lots of space to tuck little elements behind. All the paper and embellishments are from the October Hip Kit Club. Still plugging away at those awesome kits! 

Thanks for stopping by! =) T


Friday, March 16, 2018

Happy Together

Hello Crafty friends and happy weekend! Today I have a layout to share with you that features my adorable niece and my dog Keyser:


I wanted to play along with the "Put in on an Angle" challenge at Paper Issues. I am not usually a girl who outs anything on an angle, so that's what's so great about scrapbok challenges. It encourages you to try something new and scrap outside the box! To get started with this layout, I grabbed a great PP from Paige Evans that was already angled. The bright patterns went well with the bright pink in the photos. The navy CIRCLE I had sitting on my desk as a scrap from a previous project, and it made a nice place for my photos to rest. I cut a hot pink Project Life card in half and framed either side of the photos, giving me a spot to rest my journal card.  A scrap of black and white hearts frames the top and bottom and gave a good spot for my title to rest. Finally I tucked a silly print of the poop EMOJI begind the pics, and added a lable that says "so stinkin' cute", because 1-my niece has a thing for the poop emoji and 2-she really is stinkin' cute isn't she? 

Thanks for stopping by! =) T

Challenges for this layout:
-Paper Issues put it on an angle
-Scrap Our Stash happy with an emoji


Thursday, March 15, 2018

Life is Beautiful

Hello crafty friends! Winter continues to carry on here in New England, but I'm thinking Spring in the craft room. I pulled out these 2 pics from 2 summers ago, me taking a break in my little garden:

Image may contain: 1 person, smiling, text

I used this sketch from The Hip Kit Club:
No automatic alt text available.

I knew I wanted to use my butterfly punch for some embellishments. And when I punched out a few butterflies, I realized the negative space was pretty enough to use as the circle element on the right hand side of the sketch. My punch wouldn't go all the way up the paper of course, so I traced the shape and cut it out with my craft knife. And made a mental note that this technique would be SO much easier with a Silhouette. It's on the wishlist! I added a few black splatters and Nuvo Drops in the centers of each butterfly. Let's hope this layout gives Mother Nature the hint...Spring please!!

Thanks for stopping by! =) T

Wednesday, March 14, 2018

Ready for Adventure

Hello crafty friends! Back with another layout I created from the creative nest that is my new craft room. Don't you just love when inspiration strikes? 

I decided to play along with the Feel the Beat challenge at Paper Issues. They're challenging you to create a layout inspired by the album cover from Twentyone Pilots:

No automatic alt text available.

As soon as I saw this challenge, I KNEW I had the perfect paper to use. My friend Karen had given all her attendees at last week's crop a little kit of supplies from Creative Memories, and it was just waiting to be scrapped! The colors of the papers are black, red, and yellow, and I wasn't sure how I'd put them to use, but this challenge fit them PERFECTLY! 

Image may contain: 4 people, people smiling

I hand-cut circles from white cardstock to mimic the circles on the album, and this also fit in well with the latest challenge over at Pile It On, circles! Strips of yellow paper for my journaling (the reverse of the  background) mimicked the band name and title on the cover. I added a vellum mat behind the photo to soften the edges a bit. Then I tucked a chipboard tag I had from a pair of jeans behind the pic, top and bottom, fitting in with the tag challenge at Challenge Up Your Life. I carried the stars from the background throughout the layout with a few wood veneer stars, a metal star clip and a red puffy star. 

Thanks for stopping by! =) T

Tuesday, March 13, 2018

Girl Squad

Hello crafty friends! Back again with another sketch and layout. Here in my neck of the woods it has been snowing, snowing, snowing. Sure, I do wish it was warmer more Spring-like weather, but it is nice to enjoy a cozy snow day in my craft room. Still plugging away at some 2016 pics that I found in the big craft room move, here's a layout of my daughter and her friends after soccer practice:


And the sketch and mood board I used for inspiration from Let's Get Sketchy:

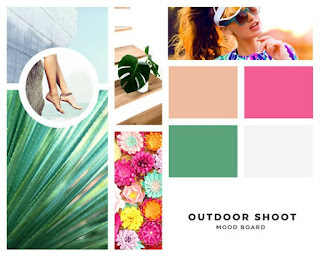
Fot this layout I grabbed a pattern paper from my stash, it's a lovely Basic Grey I've been holding on to, and fits well with the mood board. I then pulled a few different PPs from my scraps to use as the banners behind the photo. I outlined each banner and then tore the bottom edge to add a little texture. The "Girl Squad" title is a Thickers from American crafts, I love the how bold and eye-catching these jumbo titles are. To balance out the bold black from the title, I matted the entire layout and the photo on black, and added a few elements of black throughout with mist, 2 soccerball stickers, and a black and white scrap as one of the banners. 

Thanks for stopping by! =) T 

Monday, March 12, 2018

Foodies


Hello crafty friends! Last week I moved my craft room downstairs. Now I'm right off the kitchen, sort of in the thick of it and love it! The move has allowed me to get all my crafty stuff together in one place, it's been a bit here, there, and everywhere since I moved into this house a little over a year ago. So it's out of the attic and out of the spare room and out of the garage...and wow I have a LOT of stuff! Time to get crafty, and luckily the move has sparked my creative juices! 

Something I really love to do is participate in online challenges. Not only does it serve as a great jumping-off point, but it also gives a bit of sense of community. You share your work with other scrappers, see what they're creating, and it's almost like being part of a virtual crop. Here's my latest:

Image may contain: 4 people

And I based it on the sketch from the Paper Issues and Stuck?! Sketches partner challenge:

No automatic alt text available.

This was a fun layout to create, and  the easy sketch allowed me to stay within in my "20 minutes or less" perameter. I started with the background paper, while we actually didn't use ANY untensils while consuming food at the Food Truck Festival, the paper fit the theme well, and I was happy to put something to that's been hanging around my stash for a loooong time. The bright colors of the paper coordinated well with the bright colors of my kids' shirts too. I trimmed the background down to 11.5x11.5, giving a this white border to calm things down a bit. And see the red and yellow dotted paper strips above and below the photos? That's the reverse side of the background, I had 2 1/2' strips leftover that were put to good use. For the large circular element of the sketch, I scribbled a circle on a bright blue paper and then hand-cut to create a messy, artsy circle. I knew I wanted "foodies" as my title, but sadly my Thicker collection is MIA, and I was too lazy to plug in the Cricut. So I just hand-wrote the title in grey pen on a light blue scrap and fussy cut it out. Not the best, but it did the trick! 

Thanks for stopping by, I'll have a few more layouts to share later in the week. =) T